Guide · Blower Parts
Blower Repair Guide: Common Faults and How to Fix Them
2,928 words · published 2026-09-26
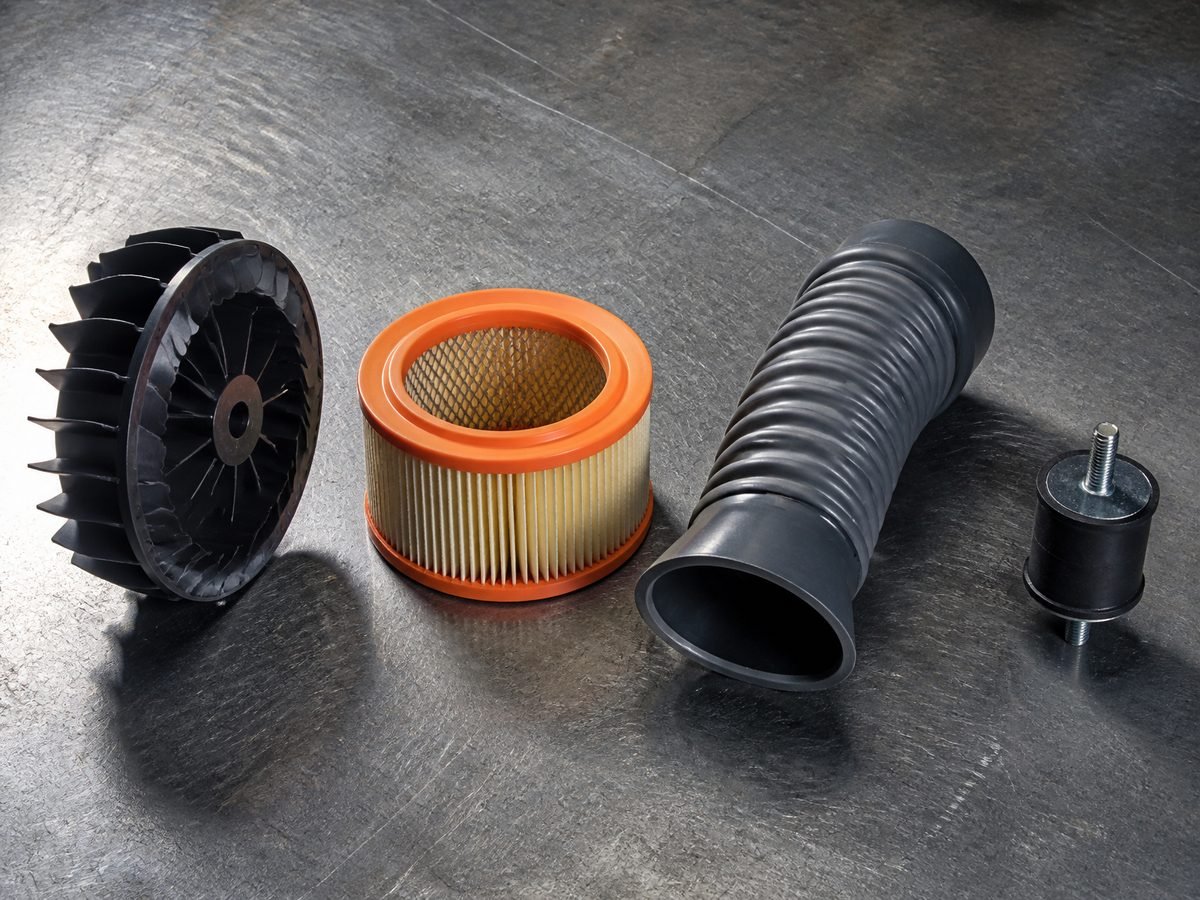
Machine class: petrol blowers only. This guide covers handheld and backpack two-stroke blowers in the Stihl BG and BR class, Husqvarna 125B, 130BT and 350BT class, and similar machines. It does not apply to chainsaws, brush cutters or trimmers, whose ignition, drive and cutting systems differ, nor to battery or electric blowers.
Safety disclaimer. This is general guidance, not a substitute for your machine's own manual. Where a repair needs a figure specific to your machine — a torque value, an ignition gap, a mix ratio or a carburettor setting — the figure belongs to your manual, and we do not publish one that could be wrong for your machine. Work beyond your competence should go to a qualified technician. Pentales Agro is an independent distributor with no Stihl or Husqvarna agency; brand names describe fitment only.
A petrol blower is mechanically simpler than a saw or a brush cutter — no cutting attachment, no clutch, no drive shaft — which means almost every fault falls into one of three boxes: it will not run properly, it runs but produces weak airflow, or the controls and casing are damaged. Working out which box you are in takes a minute and saves most of the wasted effort on these machines.
Before You Start: Setup and Safety Baseline
Drain the fuel and run the engine dry before opening anything. A blower holds fuel in a tank and a carburettor bowl, and both are fire risks near an ignition system.
Pull the spark plug lead and tuck it clear so the engine cannot fire while you turn it over by hand.
Understand what the impeller means for safety. A blower's impeller is a high-speed fan inside a thin-walled housing, and the housing is a single piece of moulded plastic on most machines. It is easy to crack, and a cracked housing can let the spinning impeller throw fragments or let debris enter the fan. Treat the casing as a component with a safety function rather than as trim.
Disconnect the battery or the plug, and confirm the machine is off before you put a hand anywhere near the impeller, the fan inlet or the tube mount. An impeller that is turned by hand with the plug connected can start an engine.
Work on a clean surface and lay out the fasteners. Blower casings are held by many small self-tapping screws that thread into plastic, and a screw driven into the wrong hole or overtightened will strip the boss and leave a casing that will not seal. Note which screws came from which hole; they are frequently different lengths.
Do not use compressed air to blow out the inside of a machine that still contains fuel, and do not blow dust out of a casing in a workshop where fuel vapour may be present. Use a brush and rags, and clean the exterior before opening the machine so that dust does not fall into the engine.
Have to hand: the correct driver for the casing screws, a soft brush, clean rags, and a place to keep the removed tube and nozzle assembly so it is not stood on. Tubes crack easily and are a common unnecessary replacement.
Diagnose in the Right Order
Blower faults divide cleanly. Decide which of the three boxes below you are in before you start, because the checks differ completely.
Box one: it will not start, or it runs badly. The fault is in the engine, ignition or fuel system. Check the simple things first — fresh fuel of the correct mix, a clean air filter, a spark plug that is not fouled, a plug lead pushed home, and the stop switch in the run position. A blower that has sat through a wet season with fuel in it will need its carburettor looked at, and that is the single most common repair on these machines.
Box two: it runs but airflow is weak. The engine is fine and the fault is downstream: a blocked or damaged impeller, a casing leak, a cracked or wrongly seated tube, debris jammed in the fan, or an air filter so clogged that the engine cannot make power. Confirm by checking whether the engine reaches full speed. If it revs freely but moves little air, the fault is mechanical. If it will not rev, the fault is fuel or air supply to the engine.
Box three: the controls or casing are damaged. A stiff or broken throttle trigger, a cruise-control that will not hold, a cracked casing, a split tube or a torn backpack harness are all simple replacement jobs. Do not attempt to repair structural cracks in a casing with tape or adhesive — a casing that flexes lets debris into the impeller.
Check the obvious first. Is the tube fitted the right way round and seated fully? Is the nozzle correct for the task? Is the air filter element present at all — filters are sometimes removed and never replaced, which lets grit into the engine and wears the bore. Is the spark arrestor screen in the muffler blocked, which is a very common cause of a blower that loses power as it warms up?
Carburettor, Diaphragms and Fuel Filters
The blower carburettor is a small diaphragm unit, and it is where most blower running faults live. These carburettors are rebuildable and the rebuild is cheap.
Symptoms of a tired diaphragm. Poor acceleration, an inability to hold a tune, a machine that stalls when you turn it on its side, or a machine that only runs with the choke partly on. All of these point at the metering diaphragm, which stiffens with age and with ethanol-blended fuel and stops responding to the pressure changes it depends on.
Rebuild with a kit, not with individual parts. A carburettor kit contains the gaskets, the metering and pump diaphragms, the needle valve and its spring. Fitting them as a set is both faster and more likely to work, because a new diaphragm against a worn needle valve still leaks. Keep the gasket and diaphragm order exactly as you found it: the sequence of thin parts around the metering chamber is easy to reverse, and a reversed diaphragm produces a machine that will not run at all.
Clean the passages properly. Soak and clean the body, then blow every passage through with compressed air, working from the direction the fuel travels. Varnish from stale fuel is the usual blockage, and it is invisible until you look through the passage against a light.
Fuel filter and lines. The in-tank fuel filter and the fuel lines are the second most common blower fault, and they are the cheapest. A hardened, cracked line inside the tank causes a machine that runs for a minute and then leans out and dies; a clogged tank filter causes the same symptom more gradually. Replace the filter with the correct type for your machine — a filter of the wrong size falls off the line inside the tank and produces a machine that will not run at all.
Tank vent. A blocked tank vent creates a vacuum, which starves the engine after a period of running and then clears when the machine is left to stand. The giveaway is a machine that runs well, fades, and recovers after you loosen the fuel cap.
Never adjust the mixture screws to compensate for a blocked passage. A lean high-speed setting will seize a two-stroke engine, and the correct settings are model-specific. If a blower needs more than a small idle correction, it needs the underlying fault found.
Impeller, Housing and Airflow
If the engine is healthy, airflow loss is mechanical, and the fan side of a blower is straightforward to inspect and easy to damage if handled carelessly.
Debris in the impeller. Leaves, twigs, string, plastic and shredded material collect between the impeller blades and the housing. This does two things: it reduces airflow and it unbalances the impeller. You will feel and hear it as a vibration or a scraping sound. With the machine off and the plug disconnected, remove the casing and clear the material, then inspect the blades for damage.
Blade damage and imbalance. A blower that has ingested stones or metal will have chipped, bent or cracked impeller blades. A cracked impeller is replaced, never repaired — it spins fast enough for a fracture to be dangerous. Bent blades cause heavy vibration, and vibration will break the housing or the bearing.
Housing cracks and leaks. A cracked casing loses airflow and lets debris in, and it can also release fragments. Small cracks are not a tape-and-glue repair. Replace the housing, and check while it is apart that the mounting points are not cracked and that the casing sits flat when reassembled.
Bearing play. With the casing open, turn the impeller shaft by hand. It should turn freely and quietly with no perceptible side-to-side play. Roughness or play means the bearing is failing, and continuing to run it will let the impeller contact the housing and destroy both.
Air intake blockage. The intake grille and the shroud that feeds air to the fan can become packed with dust, grass and fine debris, and a blower used in dry conditions will block up quickly. A blocked intake is a very common cause of "the blower has lost its power" and it takes a brush to fix.
Air filter. The engine air filter is a separate item from the fan intake, and it is the one that protects the engine. A clogged engine filter enriches the mixture, causes hard starting and black plug fouling, and robs the machine of the air it needs to make power. Clean it often and replace the element when it is degraded, because these machines work in exactly the dust that destroys filters.
Tubes, Nozzles, Controls and Harness
This is the least mechanically interesting part of a blower and the source of a surprising share of complaints, particularly on machines used by several people.
Tube fitting. Blower tubes seat into the casing outlet with a twist or a clip, and they seal against a lip. A tube that is not fully seated leaks air, and a blower with a leaking tube feels weak even with a healthy impeller. Check the seating before you look anywhere else, and check the seal or gasket at the outlet if the machine has one.
Cracked or split tubes. Rigid tubes crack at the joint and flexible tubes split along the corrugation. A split tube loses a large amount of airflow and makes an obvious hissing or fluttering noise under load. Replacement is the fix; tape will not hold under the pressure and vibration.
Nozzle choice. Wide nozzles move a large volume of air at lower speed, narrow nozzles concentrate it. Using the wrong nozzle for the task is often mistaken for a machine fault, particularly when a narrow nozzle is expected to move wet leaves.
Throttle trigger and cruise control. A stiff trigger is usually a worn or dirty cable or a sticky linkage rather than a carburettor fault. The cruise-control or lock function must work reliably and must release when the trigger is pressed — a cruise control that sticks is a genuine safety fault, because it leaves the machine running at speed while the operator has let go.
Stop switch. Confirm the stop switch works and that it kills the engine immediately. On a blower used in dusty conditions, a switch that has become intermittent should be replaced rather than cleaned and hoped for.
Backpack harness. On backpack machines, the harness bears the entire machine's weight and transmits vibration. Inspect the straps, buckles, and the frame-to-harness mounts. Frayed webbing, a cracked frame or collapsed rubber mounts all need replacing, and the rubber mounts also affect the vibration reaching the operator's back.
Engine, Ignition and Starting Faults
The engine side of a blower is a small air-cooled two-stroke and behaves much like any other, with a few points worth knowing.
Spark plug and ignition. A fouled or worn plug and a weak ignition coil produce the same symptoms as on any two-stroke: hard starting, an engine that will not hold speed, and an engine that dies when hot. The coil gap is set to a specified thickness and is model-specific — take the figure from your manual rather than guessing, because too wide a gap weakens the spark and too narrow a gap lets the flywheel strike the coil.
The spark arrestor screen. A screen in the muffler caked with carbon is a classic cause of a blower that starts well and then loses power and refuses to rev as it warms. It is out of sight behind the muffler cover and is frequently never checked. Clean or replace it.
Cooling and dust. Blowers run in dense dust, and that dust packs the cooling fins and the fan shroud. A machine that overheats will lose power and eventually score its cylinder. Clear the cooling path at every service, not once a season.
Compression. A blower that is hard to start, has a weak spark, good fuel and still will not run may have lost compression through worn rings or a scored bore. As with any two-stroke, the figure your machine should produce is model-specific — take it from your manual, and treat a top-end rebuild as a decision to be based on a measurement rather than on a hunch.
Anti-vibration mounts and the engine moving. If the rubber mounts that carry the engine have perished, the engine moves under load, which chafes fuel lines and can pull the inlet boot loose. A split inlet boot leans the mixture and produces a machine that will not idle but runs at speed. Replace the mounts and the boot together.
Tools and Parts You Will Need, and the Repair Sequence in Order
Gather everything before you start, and keep every screw with the hole it came from.
Tools: the correct screwdriver sizes for the casing and shroud fasteners, a soft brush, clean rags, a tray for fasteners, and a light source for inspecting the carburettor passages.
Parts to have ready: a carburettor diaphragm and gasket kit, an air filter, a fuel filter and fuel line, a spark plug, and a spark arrestor screen if your machine has one. If you are opening the fan housing, check the impeller for cracks before you need to order one.
The repair sequence, in order:
- Drain the fuel and run the engine dry, then disconnect the spark plug lead.
- Confirm which box you are in: will not run, runs but weak airflow, or damaged controls and casing.
- For weak airflow, check the tube seating, then the intake grille, then the impeller for trapped debris.
- For running faults, check fuel freshness, air filter, plug, and the spark arrestor screen.
- Check the tank filter and the fuel lines for hardness, cracks and blockage.
- Rebuild the carburettor with a full kit, keeping the sequence of thin parts exactly as found.
- If the housing is cracked at a mounting boss, replace it rather than patching it.
- Reassemble, checking that the casing sits flat and the tube seats fully.
- Test outdoors, with the tube pointed away, and confirm the throttle return and the stop switch.
- Recheck for new vibration after a few minutes, which means something is not seated.
Checking Your Work and Knowing When to Stop
Test in a way that does not require you to stand in the airflow, and confirm the safety functions before the machine goes back into service.
Start it with the tube pointing away from you and from anyone else, ideally outdoors. Dust and debris are ejected from the tube at speed, and a workshop is quickly filled with whatever was inside the casing. Never test a blower indoors — the exhaust and the dust make it an air-quality problem, not just a mess.
Confirm the controls before anything else. The throttle trigger must return under its own spring, the cruise control must engage and release cleanly, and the stop switch must kill the engine immediately. A blower whose stop switch does not work cannot be safely used.
Check the airflow test properly. A blower moving air well will hold the tube steady and blow a clear channel through light debris. If it revs but feels weak, recheck the tube seating and the intake before suspecting the impeller again.
Re-check for vibration and noise after a few minutes. New vibration after a repair almost always means something is not seated — a casing not fully home, a tube not aligned, or an impeller not correctly fitted.
Stop and hand the job over if: the impeller is cracked or bent; the housing is cracked at a mounting boss; the crankshaft has perceptible play in its bearings; the engine has lost compression; or the carburettor needs adjustment beyond a small idle correction. Each of these is a repair with a destructive failure mode if done badly, and a blower is not an expensive enough machine to justify gambling a rebuild on.
Parts for Stihl-class and Husqvarna-class petrol blowers — carburettor kits, diaphragms, fuel filters and lines, air filters, spark plugs and coils, impellers, housings, tubes and nozzles, throttle cables, stop switches and anti-vibration mounts — are listed in our blower parts catalogue. Where a repair needs a figure we have not published, such as a torque value, an ignition gap, a compression reading or a mix ratio, take it from your machine's own manual: it is model-specific, and a wrong figure is worse than no figure.
Browse Blower Parts · Ask us about a repair · All 13 guides
Pentales Agro is an independent distributor. We hold no Stihl or Husqvarna agency, and brand names appear only to describe which machines a part fits.