Guide · Chainsaw Parts
Chainsaw Repair Guide: Common Faults and How to Fix Them
3,084 words · published 2026-09-26
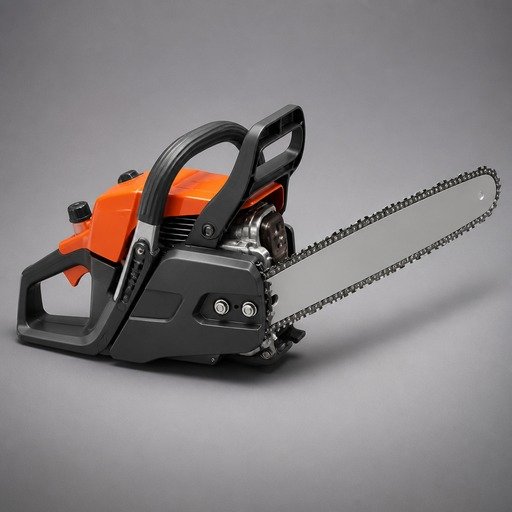
Machine class: petrol chainsaws only. This guide covers Stihl MS-class and Husqvarna 100–300 series class two-stroke chainsaws and similar machines. It does not apply to brush cutters, blowers, trimmers or battery saws, whose fuel, ignition and drive systems differ. If you are holding a trimmer, stop and read the trimmer guide instead.
Safety disclaimer. This is general guidance, not a substitute for your machine's own manual. Some repairs below are straightforward; others are not. Work beyond your competence, and any job needing a figure we have not published, should go to a qualified technician. Pentales Agro is an independent distributor and has no Stihl or Husqvarna agency; brand names appear here only to describe which machines a part fits.
A chainsaw that will not start is almost always one of five things: no spark, no fuel reaching the cylinder, no compression, a blocked exhaust, or a safety interlock stopping the ignition. The skill in repair work is not in the fitting — it is in testing in the right order so you replace the actual fault rather than a chain of suspects.
Before You Start: Workshop Setup and Safety Baseline
Drain the fuel tank and run the engine dry before you open anything. Fuel in the tank is a fire risk the moment you start working near the ignition system, and a saw that is dry is also far easier to work on without spilling.
Remove the spark plug lead and tuck it clear of the plug so the engine cannot fire while you turn the machine over by hand. If your saw has a decompression valve, note where it sits, because you will refit it in the same orientation.
Work on a clean, uncluttered bench with the saw supported so it cannot roll. A chainsaw is an awkward shape and will tip; a saw that falls off a bench onto a concrete floor can crack a tank housing or bend the bar studs. Lay out the fasteners as you remove them, in order, on a tray or a marked sheet. Most chainsaw fasteners are similar enough to swap by accident, and a long screw in a short hole is a common cause of stripped threads.
Have these to hand: the correct spark plug socket, a compression tester if you intend to check the top end, a feeler gauge only if your manual gives a gap, a soft brush, and clean rags. Never use a metal scraper inside the crankcase or on the piston — aluminium and magnesium alloys used in saw housings score easily, and a scored surface will leak.
Finally, photograph or note the routing of every fuel line, impulse line and vent before you disconnect anything. On a saw with several similar lines, refitting one to the wrong port produces a machine that will not run and looks perfectly assembled.
Diagnose in the Right Order
Testing in the wrong order is what turns a twenty-minute job into a rebuild. Work through the checks below in sequence and stop at the first failure. Do not skip ahead because a later fault feels more likely.
Start with the simple and free checks. Is there fuel of the right kind in the tank? Is the fuel fresh, or has it been sitting in a can since last season? Is the air filter clogged with fine dust? Is the spark plug lead pushed fully home? Is the chain brake off and the master control switch in the run position? Is the choke or primer behaving normally? A surprising share of "dead" saws are one of these.
Then check spark. Remove the plug, reconnect the lead, earth the plug body against the cylinder, and pull the starter briskly. A strong, consistent blue spark at the electrode means the ignition circuit is alive. No spark, or a weak orange one, points you at the plug, the coil, the lead, the switch or the wiring.
Then check the plug itself. Is it wet with fuel after several pulls? A wet plug means fuel is reaching the cylinder, which points away from the fuel system and toward ignition or compression. A bone-dry plug after many pulls points toward fuel delivery, a blocked jet, or a crankcase air leak.
Then check compression. Turn the engine over by hand and feel for resistance on the compression stroke. A saw with worn rings or a scored cylinder turns over easily and spins down quickly with very little resistance. A compression tester gives you a number, but the figure your saw should produce is model-specific — take it from your manual rather than from a general rule.
Finally, think about the exhaust. A spark-arrestor screen caked solid with carbon will strangle a saw that is otherwise healthy and is easy to overlook because it sits out of sight behind a cover.
Ignition and Spark Faults
The ignition system on a small two-stroke saw is simple: a flywheel with magnets, a coil that generates and times the spark, a lead, a plug, and a switch that shorts the circuit to stop the engine. Faults distribute themselves in roughly that order of likelihood.
The plug first — it is the cheapest part in the system. Inspect the electrode for wear, heavy black sooting, or a wet, shiny glaze. Replace it rather than trying to clean a badly fouled plug. When you refit one, seat it by hand and then nip it up; overtightening damages the cylinder head threads and is a genuinely expensive mistake. The correct plug type and its gap are model-specific — check your manual, because the wrong heat range will foul repeatedly or run hot.
Then the coil. The coil's air gap to the flywheel is critical and is set with a business card or a feeler gauge of the specified thickness. Do not guess it: too wide and the spark weakens or disappears when hot, too narrow and the flywheel will strike the coil. If your manual gives a figure, use it. If the coil is cracked, swollen or shows a burned smell, replace it — these are potting failures that appear only when the engine reaches working temperature, which is exactly why a saw that runs from cold and dies after ten minutes is the classic coil symptom rather than a fuel one.
Then the kill switch and wiring. A chafed wire shorting against the crankcase will mimic every ignition fault in the book, and an intermittent switch will produce a saw that dies without warning. Trace the lead from the switch to the coil and look for a rubbed-through section near the housing edge.
The flywheel key is worth checking while you are in there. A sheared key throws the ignition timing out and the saw will not start at all, but it is invisible until you pull the flywheel and look.
Fuel System and Carburettor Faults
Fuel faults come in three flavours: nothing reaching the cylinder, the wrong mixture, or an air leak leaning the mixture out. Each has its own signature.
Nothing reaching the cylinder. Work backwards from the plug: is the plug dry? Then check the tank filter and the fuel line inside the tank. These lines harden and crack with age and with ethanol-blended fuel, and a cracked line inside the tank is a classic cause of a saw that runs dry above half throttle. Check the tank vent too — a blocked vent creates a vacuum that starves the engine after a minute or two of running, and it is easy to diagnose because the saw recovers after you loosen the fuel cap.
Carburettor rebuilds. Before stripping a carburettor, understand that most of them are rebuildable and the rebuild is done with a kit of gaskets, diaphragms, a needle valve and a metering lever spring. The original settings on a sealed or limiter-capped carburettor should not be altered casually. Clean the body in carburettor cleaner, blow every passage through with compressed air, and check the diaphragm for stiffness, holes or distortion. A stiff diaphragm is the most common reason a saw will not accelerate cleanly.
Adjustment is where damage happens. Carburettor screws control the idle and the high-speed mixture. Adjusting the high-speed screw too lean makes a saw feel powerful for a very short time and then seizes its piston. If your saw needs adjustment beyond the factory range, the underlying fault — a blocked jet, an air leak, a tired diaphragm — is still there. Because the correct setting is model-specific, and because a lean setting can destroy the engine, send a saw needing anything other than a small idle adjustment to a technician with a tachometer.
Air leaks. A crankcase leak, a failed crankshaft oil seal, a loose cylinder base gasket or a split inlet boot all lean the mixture and all produce the same symptom: an engine that races when warm and will not hold a steady idle. Chase this with a pressure test, not with the mixture screws. If you find a failed oil seal or base gasket, replace it — sealer on a torn gasket is not a repair.
Clutch, Sprocket and Drive Faults
The clutch is a centrifugal mechanism that engages the chain as engine speed rises. It lives in a dirty, hot place, and the three faults below cover most of what goes wrong.
Chain turning at idle. The chain must be stationary when the engine idles. If it creeps or spins, the idle speed is too high or the clutch springs are stretched or broken. Correct the idle first; if the chain still turns, the clutch needs replacing. This is a safety fault, not a nuisance — a saw whose chain turns at idle can cut the moment it is lifted.
No drive under load, or a burning smell. A clutch drum with worn, glazed shoes slips, and the saw squeals or loses chain speed when you load it. Inspect the drum for heat discolouration and deep grooves, and check the sprocket, which is usually part of the drum assembly or a rim on the same shaft. A worn sprocket wears a new chain out rapidly, so replace the sprocket when you replace the chain if the sprocket shows hooked or worn teeth.
Drive sprocket alignment and bar fit. A sprocket that does not match the chain's pitch and gauge will not seat the drivers properly. The chain's pitch, gauge and drive-link count are stamped on the chain, and the bar must match. Refitting a chain of the wrong gauge on a worn sprocket is one of the most common causes of thrown chains and of chains that snap.
Take the clutch off with the correct tool for your machine. Improvised removal methods — locking the piston with a screwdriver through the plug hole — break piston skirts and ring lands. If you do not have the right tool, this is a job to hand over.
Top-End Work: Cylinder, Piston and Compression
The "top end" means the cylinder, piston, rings and the bearings they run on. Work here is only justified when you have measured a genuine loss of compression, or found scoring, or had a saw seize.
Decide whether it is warranted before you strip anything. A straight-gassing saw that seizes while hot, a saw with a scored piston skirt visible through the exhaust port, or a compression reading well below your manual's figure, all justify a top end. A saw that simply will not start is usually not a top-end job.
What the job involves. With the covers, exhaust, carburettor and top handle removed, the cylinder is unbolted and lifted clear. The old gasket or sealing surface is cleaned back to bare metal, and the cylinder bore is examined for vertical scratches — scoring that you can feel with a fingernail is fatal to the cylinder and it must be replaced with the piston. The piston, rings and small-end bearing are then replaced as a set. Fitting a new piston and rings into a scored or worn bore, or reusing a worn small-end bearing with a new piston, guarantees a second failure.
Cylinder and piston kits are supplied as matched sets precisely because bore and piston are sized to each other. Use them as a set and keep the arrow or marking on the piston crown facing the exhaust port, because fitting a piston backwards destroys the engine within minutes.
After assembly, check before you run. Turn the engine over by hand several times with the plug out and feel for any tightness or metallic contact. There should be none. Then run the saw gently for the first tank at part throttle, letting it cool between short runs, rather than immediately working it hard.
Bar, Chain and Tensioner
The bar and chain consume more of a saw's working life than the engine does, and most cutting complaints trace back to them rather than to power.
Check the bar for wear, not just for straightness. The bar rails wear and develop a burr on the edges, and the groove they form widens with use. A worn groove lets the chain rock and lean, which produces cuts that curve and chains that derail. Dress the rails with a flat file to remove the burr, and check the groove with a straight edge or a gauge of the chain's gauge size to see whether it has opened up. A bar with a closed-up or badly widened groove is replaced, not repaired.
The nose sprocket. On a sprocket-nose bar the teeth can seize or disintegrate with grit. Spin the sprocket with a finger; it should turn freely and quietly. A seized nose sprocket generates heat and flattens the chain in seconds.
Tension is a moving target. Tension on a cold chain will be wrong once the chain and bar are hot, which is why the correct routine is to set tension, run the saw briefly, and recheck. The chain should be able to be pulled around the bar by hand with a light drag and should sit snugly against the bar's underside without sagging away from it. Never tension a chain so tight that it binds — that loads the crankshaft bearing and burns the bar nose.
Oil delivery. A bar oiling fault shows up as a blued, smoking bar and a chain that stretches. Check the oil tank level, the oil filter, the pump drive and the bar's oil inlet hole for a blockage. Run the saw briefly with the bar tip near a piece of card to confirm oil is being thrown off the sprocket.
Tools and Parts You Will Need, and the Repair Sequence in Order
Gather everything before you start, so that a job does not stall with the machine open and the fuel system exposed.
Tools: the correct spark plug socket, a compression tester, a soft brush, clean rags, the correct driver sizes for the casing and cylinder fasteners, a tray for fasteners, and — if you are going into the clutch or flywheel — the specific removal tools for your machine.
Parts to have ready: a replacement spark plug of the correct type, an air filter, a fuel filter and fuel line, a carburettor rebuild kit if you suspect the diaphragm, and the gasket or seal for any joint you plan to open. Do not open a sealed joint unless you already have its replacement to hand.
The repair sequence, in order:
- Drain the fuel and run the engine dry. Disconnect the spark plug lead.
- Check the free items: fuel freshness, air filter, plug lead, chain brake, master control switch.
- Test for spark by earthing the plug against the cylinder.
- Read the plug: wet means fuel is arriving, dry after many pulls means it is not.
- Check compression by feel, then with a tester if you have one.
- Check the exhaust and the spark arrestor screen for carbon blockage.
- Test spark again once the engine is warm if the fault only appears hot — that is the coil signature.
- Only then open the fuel system or the top end.
- Reassemble with new gaskets, using the correct sequence and tightening in stages.
- Test in stages: drive first, then safety systems, then a short run and a leak check.
Checking Your Work and Knowing When to Stop
Reassembly is where a good repair becomes a repeat failure, so treat the first start-up as a test rather than a finish.
Sequence the start-up. Refit everything dry and clean, with new gaskets where you opened a sealed joint. Add fresh, correctly mixed fuel. Start the saw with the bar and chain fitted but with the chain brake on and the machine on the ground, away from anything that could be cut. Let it idle and listen. A saw that idles steadily and picks up cleanly from idle to full throttle, without a hesitation or a stall, is a saw whose mixture is broadly correct.
Then check the safety systems deliberately. With the saw idling, engage the chain brake by hand and confirm the chain stops. Release it and confirm the chain rotates freely by hand with the engine off. Check the throttle lock-off and the master control switch both work. These three checks catch the most dangerous outcomes of a repair, and they take under a minute.
Then re-check for leaks and heat. Run for a few minutes, stop it, and look for fuel or oil weeping around joints, and feel the housing for abnormal heat. A repair that leaks is a repair that will fail again.
Know where the limit is. Stop and hand the job to a qualified technician if: the saw needs carburettor adjustment beyond a small idle correction; you find scoring in the cylinder bore; a crankshaft bearing feels rough or has play; the crankcase is cracked; or you do not have the correct tool for the clutch, flywheel or crank. Each of these can be done at home, but each has a failure mode that turns a repair into a rebuild. There is no shame in that boundary — it is where most professionals draw it too.
Parts for Stihl-class and Husqvarna-class chainsaws — ignition coils, carburettor rebuild kits, clutch drums, sprockets, cylinder and piston kits, bars, chains and filters — are listed in our chainsaw parts catalogue. Where a repair needs a figure we have not published, such as a torque value, a spark plug gap or a compression reading, take it from your machine's own manual: it is model-specific, and a wrong figure is worse than no figure.
Browse Chainsaw Parts · Ask us about a repair · All 13 guides
Pentales Agro is an independent distributor. We hold no Stihl or Husqvarna agency, and brand names appear only to describe which machines a part fits.