Guide · Trimmer Parts
Trimmer Repair Guide: Common Faults and How to Fix Them
3,320 words · published 2026-09-26
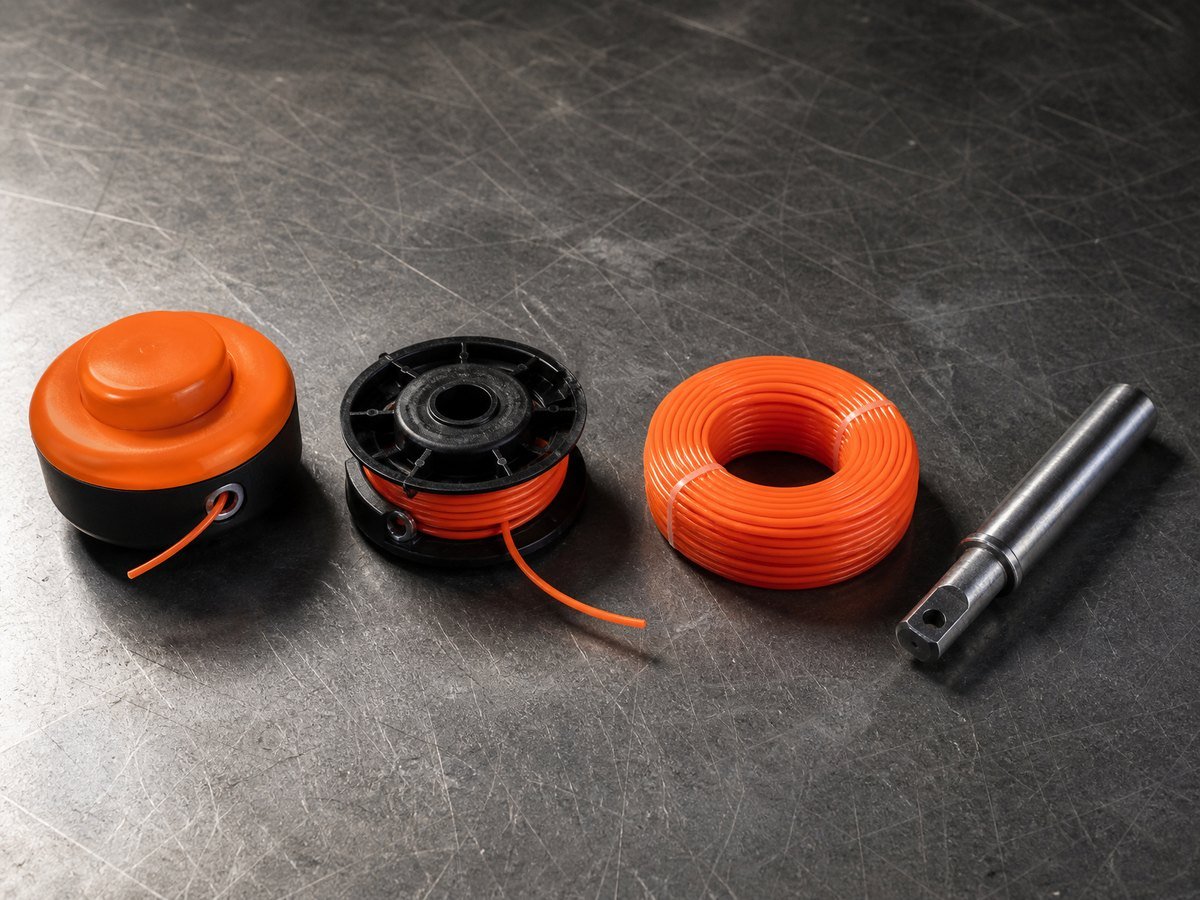
Machine class: petrol string trimmers only. This guide covers light and mid-weight petrol trimmers — machines with a curved shaft and a flexible drive cable, or a light straight shaft — in the Stihl FS38, FS55 and FS70 class, Husqvarna 128 and 129 class, and similar. It does not cover heavy-duty brush cutters with a rigid shaft, gear head and harness, which are covered in the brush cutter guide. If your machine takes a metal blade and hangs from a harness, you want that guide instead.
Safety disclaimer. This is general guidance, not a substitute for your machine's own manual. Where a repair needs a figure specific to your machine — a torque value, a cable lubricant specification, a mix ratio or a carburettor setting — the figure belongs to your manual, and we do not publish one that could be wrong for your machine. Work beyond your competence should go to a qualified technician. Pentales Agro is an independent distributor with no Stihl or Husqvarna agency; brand names describe fitment only.
A trimmer is the simplest petrol garden machine to repair, because most of what goes wrong is in the head, the line, or the cable — all of it accessible without opening the engine. The most common complaint by a wide margin, "the head will not feed line", is a head or line fault rather than an engine fault, and it is usually fixable in minutes.
Before You Start: Setup and Safety Baseline
Drain the fuel and run the engine dry before opening anything. Fuel in a tank is a fire risk around an ignition system, and these machines are small enough that a spill reaches hot surfaces quickly.
Remove the spark plug lead and tuck it clear so the engine cannot fire while you turn the head or the engine by hand. When you work on a trimmer head you are turning the drive train directly, and a machine that fires while you are doing that is dangerous.
Take the cutting head off first if you are working on the drive. It makes the cable or shaft test meaningful, because you can feel the drive directly rather than through a head that may itself be seized.
Do not grip the shaft tube in a vice. These tubes are thin aluminium or composite and crush easily, and a crushed tube traps the cable and produces permanent vibration. Support the machine at both ends or hang it by the loop.
Watch the small parts. Trimmer heads contain a spool, a spring, a cover, and on some designs a set of small retaining clips or a locking mechanism. These parts disappear into grass readily, so work over a tray. Losing a spool spring is the most common reason a machine sits unused for weeks.
Have to hand: the correct driver for the head and casing screws, clean rags, and fresh line of the correct diameter for the head. Most trimmer heads are held by a single bolt, and the direction of that bolt's thread matters — see the drive section below.
Diagnose in the Right Order
Trimmer faults separate into head faults, drive faults and engine faults. Identify which one you have before touching anything, because almost all of a trimmer's day-to-day failures are in the first two.
If the head will not feed line, or line breaks constantly, it is a head or line fault. This is the most common problem on trimmers and it is covered fully in the head section below. Do not go near the carburettor for this symptom.
If the engine runs but the head does not turn, it is a drive fault — the cable, the shaft, the drive coupling or the clutch. Test it deliberately: with the machine off, turn the head by hand and feel for smooth rotation, roughness, or no engagement at the engine end.
If the machine runs, the head turns, but it will not cut, look at the line before the engine. Line that is too short, too thin, or welded inside the spool cuts poorly, and an operator who has to push the head into the grass to cut anything is a symptom of the wrong line rather than a weak engine.
If the machine is hard to start or will not hold a tune, it is an engine fault — fuel, filter, plug or carburettor. These are covered below and are the same logic as any small two-stroke.
If the machine vibrates, stop and inspect. On a trimmer, vibration almost always means uneven line lengths, a bent shaft, a worn cable or a damaged head — all of which are cheap to fix and can destroy the machine if ignored.
Check the simple things first. Is the line the correct diameter and wound the right way? Is the spool spring present? Is the guard fitted? Is the air filter clean? Is the fuel fresh? Is the plug lead pushed fully home? Trimmers are simple machines and the cheap checks catch most of it.
Trimmer Head, Spool and Line Feed
Line feed is the defining maintenance task on a trimmer, and understanding why a head fails to feed removes most of the frustration.
Line diameter must match the head. A line heavier than the head is designed for binds in the spool, will not feed under centrifugal force and overloads the engine. Line lighter than specified breaks constantly and leaves an unbalanced head. The correct diameter is marked on the head or specified in your manual, and using it is the single most effective fix for feed problems.
Winding direction matters. Most spools are wound in a specific direction, usually marked with an arrow, and the line then feeds correctly as the head turns. A spool wound the wrong way will not feed at all. The common winding method is to hook the line's midpoint into the spool's notch and wind both halves on in the correct direction, evenly and under light tension.
Even line lengths on both sides. Uneven halves make the head vibrate badly at operating speed, which wears the head, the cable and the bearings. Trim both ends to the same length before starting, and trim them square rather than at an angle.
Line welding. Line stored in heat, or wound tightly onto a spool and left, fuses into a solid mass that will not release. The line in a spool left in a hot shed over a Mauritian summer will do this. Unwind and discard welded line, and store spare line loose and out of the sun rather than on a spool.
Spool spring and cover wear. The spring presses the spool against the cover so that tapping the head releases line by momentarily disengaging the spool. A tired spring, a worn cover or a stretched bump knob lets the spool sit too deep, and feeding becomes unreliable or stops. These are inexpensive parts and are worth replacing as a set when you open the head.
Bump-feed vs speed-feed vs manual heads. A bump-feed head releases line when tapped on the ground and needs the spring and bump knob in good order. A speed-feed head releases line when the head is run up to speed with no load, and it needs free movement rather than a strong spring. A manual head requires the machine to be stopped and the line pulled through by hand. Diagnosing "it will not feed" correctly depends on which type you have, so identify it before ordering parts.
Trimmer line as a consumable. Line is not a part that lasts a season. Keep a stock of the correct diameter, keep it out of sunlight, and replace rather than stretch. Cutting with too little line — because it will not feed — forces the operator to over-rev and pushes the head into the vegetation, which is how trimmers get destroyed.
Carry the right spool for the job. A spare pre-wound spool turns a five-minute roadside fix into a thirty-second one, and staying in the sun with the machine apart is where mistakes happen.
Drive: Flexible Cable and Straight-Shaft Shafts
The drive between the engine and the head is where a trimmer differs most from a brush cutter, and where the maintenance differs accordingly.
Curved-shaft trimmers use a flexible cable running inside a curved tube. The cable must be lubricated as your manual specifies, and it must have a little end-float — it should not be so tight that it is loaded in compression, because a cable under compression whips and fails. A cable that has run dry will squeal, then bind, then break, and the machine simply stops driving.
Straight-shaft trimmers use a solid shaft inside a tube, usually with squared or splined ends that engage drive couplings at each end. These are more robust than a cable but the couplings wear, and a worn coupling produces a machine that drives under light load and slips when loaded.
Square drive ends wear round. The most common drive failure on both types is a rounded-off square end where the cable or shaft engages the clutch housing or the head. Inspect both ends whenever the drive is out of the machine. A coupling with rounded corners is replaced, not filed to fit.
Watch for a cable that is too long or too short. A replacement cable of the wrong length either bottoms out and loads the drive in compression, or engages too little and slips. Fit the correct cable for your machine, and check the engagement depth at both ends before reassembling.
Do not run a machine with the drive tube bent or crushed. A bent tube on a straight-shaft machine will not let the shaft run true, and on a curved-shaft machine it changes the cable's path and its lubrication requirement. A crushed tube traps the cable and cannot be repaired.
Keep the drive clean. Grit inside the tube turns the lubricant into grinding paste. Clean the tube when you have the drive out, and do not use a lubricant heavier than the specification, because excess grease migrates and binds.
The head's retaining thread. On most trimmers the head is retained on a threaded shaft, and on many machines that thread is left-handed because the shaft turns clockwise. Forcing a left-hand thread the wrong way strips the shaft end or the head boss, and on some machines the shaft must be locked with a specific tool before the head can be removed. Identify the thread direction and use the correct locking method rather than gripping the shaft with pliers, which mars the surface and destroys the seal.
Clutch and Drive Engagement
Like a brush cutter, a trimmer has a centrifugal clutch that engages the drive as engine speed rises. It is a wear item and it fails in recognisable ways.
The head turns at idle. This is a safety fault and the classic worn-clutch symptom. Either the idle speed is set too high, or the clutch springs have lost tension, stretched or broken. Correct the idle first; if the head still turns, replace the clutch springs or the clutch assembly. A trimmer whose head turns at idle can cut the moment it is lifted.
The head will not turn at speed, or slips under load. Clutch shoes that are glazed, thin or contaminated will not grip. Glazing produces a machine that slips when hot. Oil contamination means a leaking crankshaft seal on the clutch side, and if you replace the clutch without fixing the seal, the new clutch will be contaminated too.
A scored or grooved clutch drum gives a rough, jerky take-up and should be replaced rather than smoothed.
Use the correct tool, and never lock the engine with a screwdriver. Jamming an object into the cylinder to hold the engine while you undo the clutch is the standard way to break a piston or a ring land. Piston stops of the correct thread are cheap. If you do not have the right tool for your machine, this is the point to hand the job over.
Test engagement without gripping the head. Once reassembled, test with the machine on the ground and the head clear, watching that the head is stationary at idle and turns as speed rises. Never test a clutch by holding the cutting attachment.
Fuel System and Carburettor Faults
The engine side of a trimmer is a small two-stroke and behaves like any other, with a bias toward the faults caused by light use and long storage.
Stale fuel is the most common cause. A trimmer used a few times a season spends most of its life sitting with fuel in it. That fuel varnishes the carburettor's metering passages and stiffens the diaphragm, which produces hard starting, poor acceleration and a machine that will only run with the choke partly on. Drain the fuel system before storage and this fault largely disappears.
Tank filter and fuel lines. The in-tank filter clogs and the lines harden and crack. A machine that runs for a minute and then dies is usually being starved by a blocked tank filter or a blocked tank vent, and a machine that will not run at all may have a filter that has fallen off the line inside the tank.
Diaphragm rebuild. These carburettors are rebuildable with a kit of gaskets, diaphragms, a needle valve and a spring. Fit the kit as a set, keep the sequence of thin parts exactly as you found it, and blow every passage through. A reversed metering diaphragm produces a machine that will not run at all.
Air filter. Trimmers run in dust and fine grass, and the filter clogs quickly. A clogged filter enriches the mixture, fouls the plug and causes hard starting, and it is the most frequently misdiagnosed fault on these machines.
Never adjust the mixture screws to compensate for a mechanical fault. A lean high-speed setting will seize a two-stroke. Because the correct settings are model-specific and a lean setting is destructive, adjustment beyond a small idle correction belongs with a technician.
Cooling path. Fine grass packs around the cylinder and the fan housing. Clear it, because a trimmer worked hard in long grass with a blocked cooling path will overheat and lose power, and eventually score its cylinder.
Guards, Handles and Safety Devices
A trimmer's safety equipment is minimal, which makes each item more important rather than less.
The guard with its line-cutting blade. Most trimmer guards incorporate a blade that trims the line to the correct length as it spins. A missing, damaged or wrong guard means the line is too long, which overloads the engine, increases the risk of line being thrown and produces poor cutting. Fit the correct guard for your machine and never remove it to make line feed "easier" — if the line needs to be longer, the head has a fault.
Handles and clamps. The loop handle must be firm and correctly positioned. A handle that rotates under load is a loss of control, and on a trimmer it also changes the machine's balance so that the operator holds it higher off the ground and cuts poorly.
Throttle trigger, lock-out and stop switch. The trigger must return under its own spring, and the lock-out must prevent accidental throttle engagement. Test the stop switch before each use: these are small switches exposed to dust, and an intermittent stop switch on a machine with a spinning head is a genuine hazard.
Anti-vibration mounts. The rubber mounts between the engine and the shaft protect the operator's hands and, when perished, allow the engine to move and chafe fuel lines. Replace perished mounts, and treat a split inlet boot — which produces a machine that will not idle but runs at speed — as a related fault.
Harness and shoulder strap. Where a trimmer is supplied with a strap, check the webbing and the attachment point. A strap that fails drops the machine onto the operator's feet with the head still spinning.
Tools and Parts You Will Need, and the Repair Sequence in Order
Gather everything before you start, and work over a tray because trimmer heads contain small parts that vanish into grass.
Tools: the correct driver for the head and casing screws, the correct locking tool for the head's retaining thread, a soft brush, clean rags, and a tray for the spool spring and clips.
Parts to have ready: line of the correct diameter for your head, a spool and a spool spring, a head cover or bump knob if worn, a drive cable or shaft if the ends are rounded, an air filter, a fuel filter and line, and a carburettor rebuild kit if the machine will not hold a tune.
The repair sequence, in order:
- Drain the fuel and run the engine dry, then disconnect the spark plug lead.
- Remove the cutting head, noting the thread direction of the retaining bolt.
- Decide which it is: a head or line fault, a drive fault, or an engine fault.
- For feeding faults, check line diameter, winding direction, even line lengths, then the spool spring and cover.
- For drive faults, turn the head by hand and feel for roughness or no engagement at the engine end.
- Inspect both ends of the cable or shaft for rounded square drive ends.
- If the head turns at idle, correct the idle speed first, then the clutch springs.
- If the engine runs badly, work the fuel and ignition checks, plus the air filter and cooling path.
- Reassemble and test the drive with the head still off, then fit the head and test the line feed deliberately.
- Confirm the guard and its blade, the throttle return, the lock-out and the stop switch.
Checking Your Work and Knowing When to Stop
Reassembly is where trimmers get returned to service too quickly, so test in stages.
Test the drive before fitting the head where you can. With the machine assembled and the head off, start it and confirm the output shaft is stationary at idle and turns as speed rises. This isolates the clutch and drive from the head, and it means the first test is not with a spinning line head fitted.
Then fit the head and test the line feed deliberately. Run the machine up to speed and release line by the method your head uses, checking that both lengths feed evenly. Uneven feeding at this stage is much easier to fix than mid-job.
Check for vibration after a short run. New vibration after a repair usually means the drive is not seated fully, the cable has insufficient end-float, or the line lengths are uneven.
Confirm the guards and switches. The guard and its blade must be present, the throttle must return, and the stop switch must work. Then check for fuel weeping and let the machine cool before storage.
Stop and hand the job over if: the shaft end or drive coupling is rounded off; the drive tube is bent or crushed; the head's retaining thread is stripped; the clutch is retained by a thread you lack the correct tool for; the crankshaft has play or the seal on the clutch side is leaking; or the carburettor needs more than a small idle adjustment. Each of these is repairable, but each has a failure mode that damages something more expensive than the part you set out to replace.
Parts for Stihl-class and Husqvarna-class petrol trimmers — trimmer heads and spools, spool springs and covers, line, drive cables and shafts, clutch springs and clutch drums, carburettor kits, fuel filters and lines, air filters, spark plugs, guards, handles and anti-vibration mounts — are listed in our trimmer parts catalogue. Where a repair needs a figure we have not published, such as a torque value, a cable lubricant specification or a mix ratio, take it from your machine's own manual: it is model-specific, and a wrong figure is worse than no figure.
Browse Trimmer Parts · Ask us about a repair · All 13 guides
Pentales Agro is an independent distributor. We hold no Stihl or Husqvarna agency, and brand names appear only to describe which machines a part fits.